

Stiffness at the front of your hips can become noticeable after several hours at a desk, a long drive, or an intense workout.
You get up, take a few steps, and feel as though your hips need time to loosen before you can move comfortably.
Hip flexor stretches can help improve flexibility and make everyday movements feel easier. However, stretching alone cannot undo hours of sitting or address every reason your hips feel restricted.
Six exercises can help you work toward better hip mobility, starting with a simple standing stretch and progressing to the more demanding couch stretch.
One principle applies to all six: Pelvic control matters more than how far you push into a stretch.
6 Hip Flexor Stretches for Every Level
| Hip Flexor Stretch | How to Do It | Duration |
|---|---|---|
| Standing (Beginner) | Step back, tuck your pelvis, and shift forward. | 20-30 sec/side |
| Half-Kneeling (Beginner) | Kneel, engage your back-leg glute, and shift forward. | 20-45 sec/side |
| Overhead Reach (Intermediate) | Half-kneel, raise one arm, and lean to the opposite side. | 15-20 sec/side |
| Dynamic Lunge (Intermediate) | Lunge forward and return slowly. | 5-10 reps/side |
| World’s Greatest Stretch (Intermediate–Advanced) | Combine a runner’s lunge, upper-body rotation, and hamstring stretch. | 3-5 reps/side |
| Couch Stretch (Advanced) | Rest your back shin against a wall, tuck your pelvis, and lift your torso. | 20-60 sec/side |
Start with positions you can control comfortably.
More demanding exercises introduce additional balance, mobility, or positioning requirements, but they are not automatically more effective.
1. Standing Hip Flexor Stretch (Beginner)
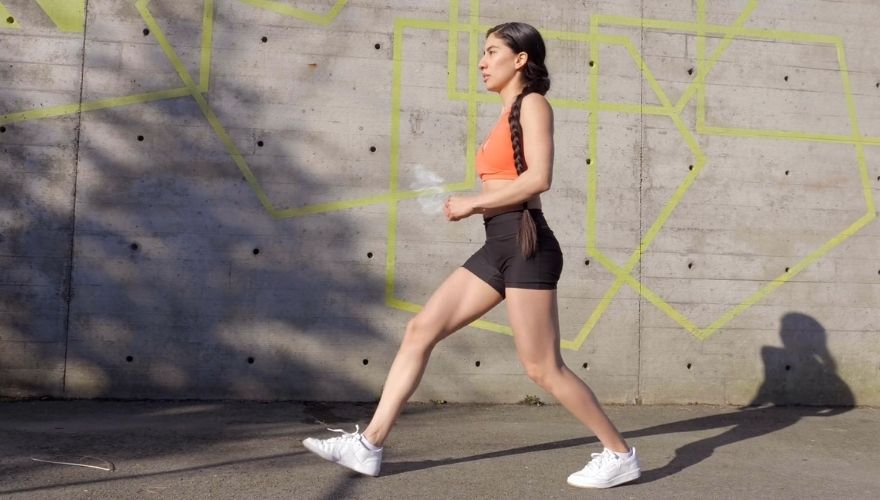
Standing hip flexor stretches are particularly useful if you spend long periods sitting or find kneeling uncomfortable.
You need no equipment, and a short movement break can fit easily into your workday. We often recommend this variation to people who struggle to make time for a longer mobility routine.
- Step one foot backward into a shallow split stance, keeping both feet pointing forward.
- Bend your front knee slightly while maintaining an upright torso.
- Gently tuck your pelvis, bringing your tailbone slightly downward.
- Shift your weight forward until you feel a mild stretch at the front of your back hip.
- Hold for 20 to 30 seconds, then switch sides.
Common mistake: Taking an excessively long step and arching your lower back to move farther forward.
Correction: Shorten your stance and maintain a gentle pelvic tuck. Hold a wall or sturdy chair if balancing makes it difficult to concentrate on your hip position.
During classes, we often see people step farther back because they expect a longer stance to create a stronger stretch. Usually, a smaller position with better pelvic control produces a clearer sensation in the intended area.
2. Half-Kneeling Hip Flexor Stretch (Beginner)
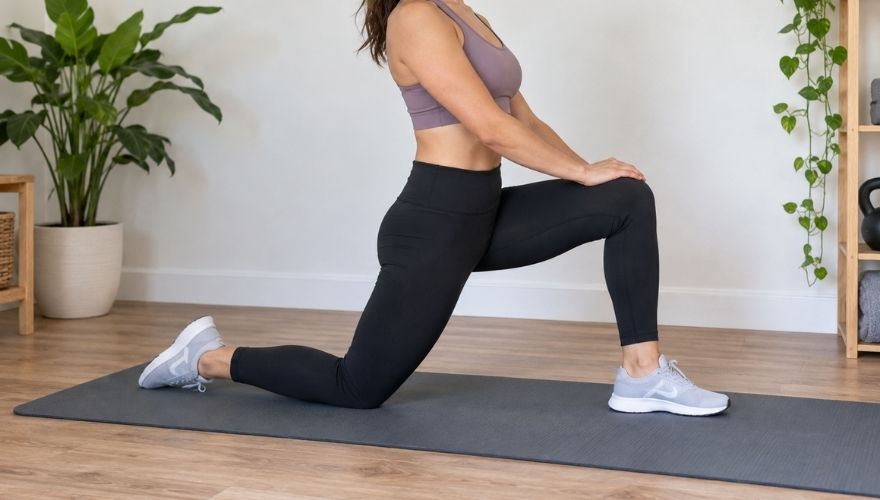
A half-kneeling lunge gives you a stable position to work on hip extension while learning to control your pelvis.
It is especially helpful for stretching the iliopsoas without introducing the substantial knee bend required during a couch stretch.
How to do it:
- Kneel on a padded mat with your right foot forward and your left knee resting beneath your hip.
- Position your right knee approximately above your ankle.
- Gently tighten your left glute and tuck your tailbone.
- Shift your hips forward slightly without arching your lower back.
- Hold for 20 to 30 seconds per side, gradually increasing toward 30 to 45 seconds as comfortable.
Common mistake: Pushing the hips forward before adjusting the pelvis.
Correction: Establish your pelvic position first, then add a small forward movement only if needed.
If your lower back starts arching as you move forward, reduce the movement rather than trying to force your hips farther.
3. Kneeling Hip Flexor Stretch With Overhead Reach (Intermediate)
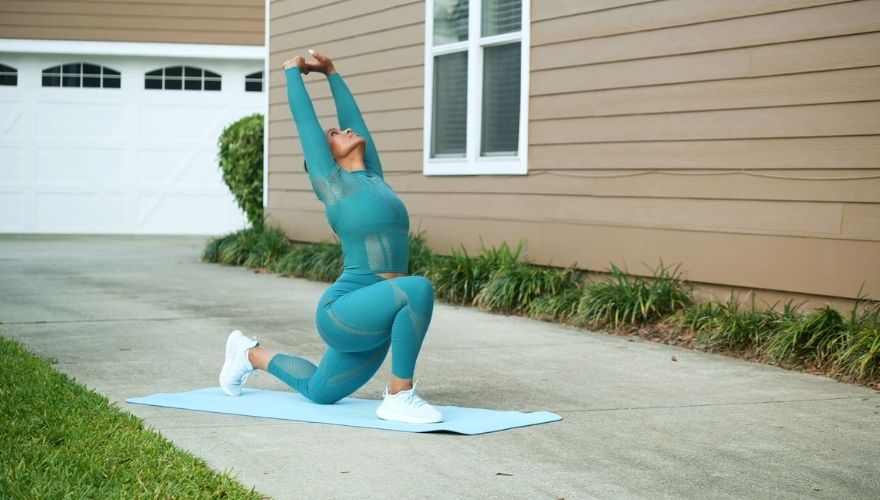
Adding an overhead reach introduces a gentle side-body stretch while maintaining the hip extension established during the half-kneeling variation.
People who participate in activities involving repeated rotation or one-sided movements, such as golf, may find this combination useful.
How to do it:
- Set up in a half-kneeling lunge with your left knee down.
- Engage your left glute and gently tuck your pelvis.
- Raise your left arm overhead.
- Reach upward before leaning slightly toward your right side.
- Hold for 15 to 20 seconds, then repeat on the opposite side.
Common mistake: Leaning backward or lifting your ribs excessively to increase the reach.
Correction: Keep your ribs positioned above your pelvis and concentrate on reaching upward before moving sideways.
You should feel the movement along the front of your left hip and potentially through the side of your torso.
If you notice most of the movement happening in your lower back, reduce the side bend. A smaller reach with better ribcage control is more useful than a larger movement created by arching your spine.
Skip the overhead component if it causes shoulder discomfort.
4. Dynamic Lunge Hip Flexor Stretch (Intermediate)
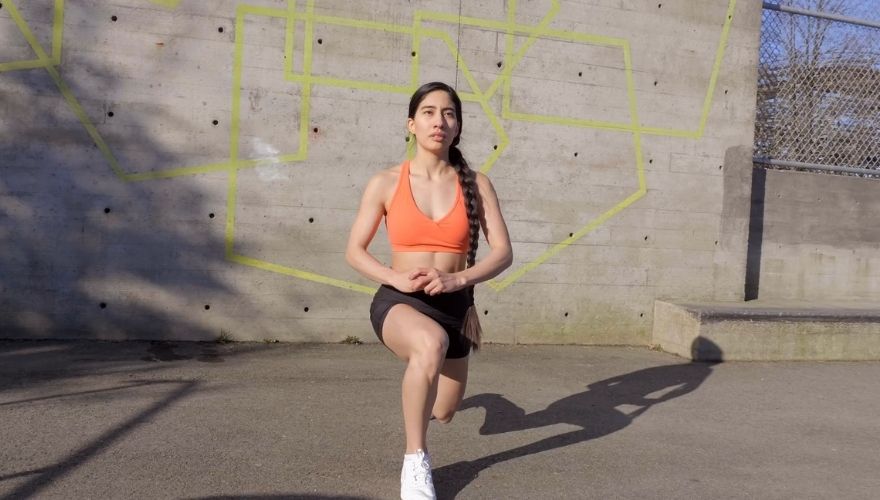
We usually introduce dynamic lunges before exercise because they let your hips move repeatedly through a comfortable range without holding one position for an extended period.
Unlike static stretching, where you maintain a position, dynamic stretching prepares you to move in and out of hip extension.
That makes this variation particularly practical before running, yoga, or strength training.
Several studies found that dynamic stretching improved jump height by an average of 1.60 centimeters compared with control conditions.
You may not be preparing for a jumping workout, but the finding helps explain why I prefer controlled movement before activities that require speed or power.
Your warm-up should prepare your body for the movements you plan to perform.
How to do it:
- Step into a comfortable split stance with your front knee slightly bent.
- Engage the glute of your back leg and gently control your pelvic position.
- Shift forward slowly, allowing your back hip to move into extension.
- Return to your starting position without losing balance or arching your back.
- Complete 5 to 10 controlled repetitions per side.
Common mistake: Moving quickly or stepping so far apart that your lower back arches during each repetition.
Correction: Use a shorter stance and slow your movement until you can maintain control throughout the exercise.
Pay attention to what happens as you return to your starting position. You should be able to reverse the movement smoothly without suddenly shifting your torso or losing your balance.
During warm-ups, I prefer seeing someone complete five controlled repetitions over ten rushed ones. Moving slowly enough to notice changes in your alignment helps you identify the range you can actually control.
5. World’s Greatest Stretch (Intermediate to Advanced)
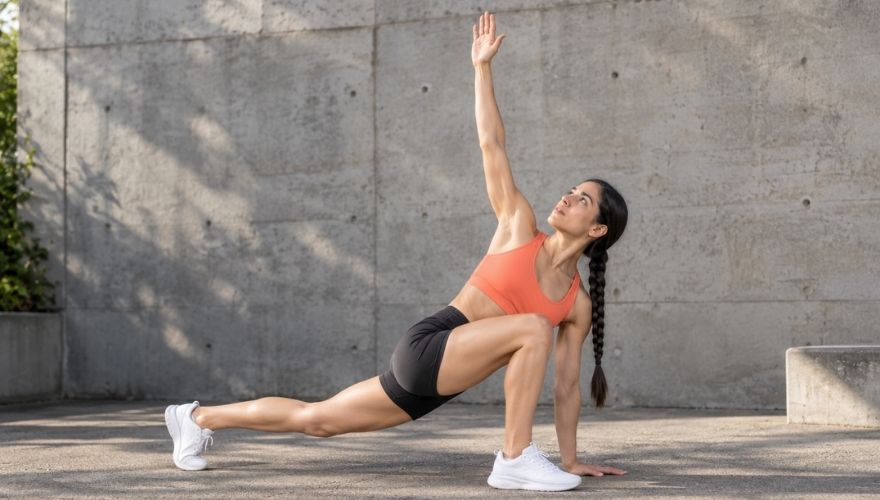
World’s Greatest Stretch combines several mobility movements into one sequence. Along with your hip flexors, it works through your hamstrings, ankles, and thoracic spine, making it a practical full-body warm-up.
A common variation uses five positions, allowing you to move between hip extension, upper-body rotation, and a hamstring stretch.
How to do it:
- Step your right foot forward into a long runner’s lunge, keeping your right heel grounded and your left leg extended behind you.
- Gently tuck your pelvis and shift forward slightly to encourage hip extension through your back leg.
- Bring your right elbow toward the inside of your right foot, moving only as low as comfortable.
- Rotate through your upper back and reach your right arm toward the ceiling.
- Return your hand to the floor, shift your hips backward, and straighten your front leg to stretch your hamstrings.
Repeat the sequence 3 to 5 times per side, spending approximately 2 to 3 seconds in each position.
Common mistakes: Lifting the front heel, twisting excessively through your lower back, or rounding your spine during the hamstring movement.
Correction: Keep your front heel grounded, rotate through your ribcage, and hinge at your hips when straightening the front leg.
You can place your hands on yoga blocks if reaching the floor causes your back to round.
One issue we frequently notice is people trying to bring their elbow all the way to the floor, even when their hips cannot comfortably accommodate that position. If your front heel lifts or your torso collapses, you have probably gone farther than necessary.
Although this sequence includes hip flexor stretching, its primary advantage is preparing several joints to move together.
It is not necessarily a better isolated hip flexor stretch than a controlled kneeling lunge.
6. Couch Stretch (Advanced)
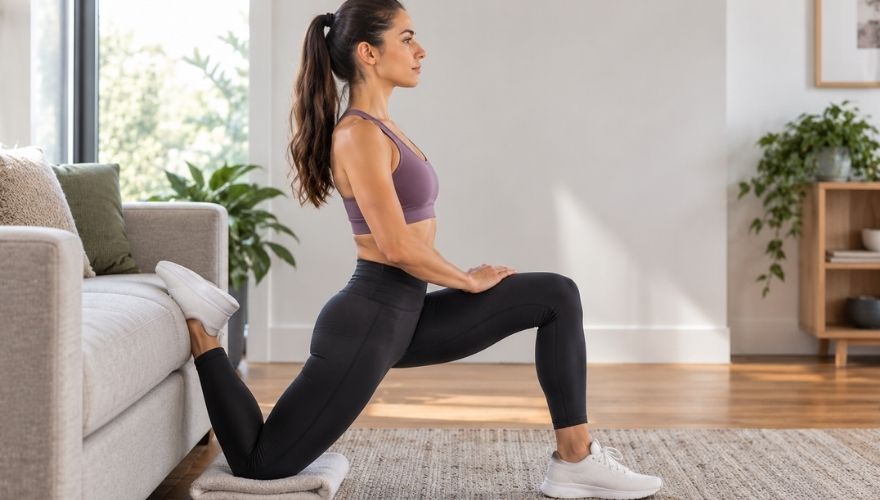
A couch stretch places greater demand on the front of your hip and thigh by combining hip extension with substantial knee flexion.
That combination is particularly relevant to the rectus femoris, which crosses both joints. Unlike a regular half-kneeling lunge, your back foot is elevated, increasing tension through the front of your thigh.
How to do it:
- Place a folded towel beneath your left knee near a couch or wall.
- Position your left shin upward against the couch or wall, with your foot supported behind you.
- Step your right foot forward, keeping your right knee approximately above your ankle.
- Engage your left glute and gently tuck your pelvis.
- Gradually raise your torso while maintaining your pelvic position.
- Hold for 20 to 30 seconds before switching sides.
As your comfort improves, work toward holds lasting 30 to 60 seconds.
Common mistakes: Forcing your torso upright, arching your lower back, or allowing uncomfortable pressure to build around your kneecap.
Correction: Move your back knee farther away from the wall, lean your torso slightly forward, or place your hands on a sturdy chair for support.
We’ve seen people manage a comfortable couch stretch while leaning forward, then lose their pelvic control the moment they try to straighten their torso. A more upright position increases the demand on the front of the hip and thigh, but that extra demand is only useful if you can manage it.
If raising your chest causes your pelvis to tip forward and your lower back to arch, you have moved past the range you can currently control.
Start with a supported forward lean and progress gradually.
Knee comfort and pelvic stability should determine your position, not how closely you can imitate someone else’s stretch.
How Often Should You Stretch Your Hip Flexors?
Consistency matters more than occasional intense stretching sessions. Start with static holds lasting 20 to 30 seconds, gradually increasing toward 30 to 60 seconds as your tolerance improves. Two or three repetitions per side can work well when time allows.
Practicing several days per week is a reasonable starting point. Some people notice changes in daily mobility after approximately 4 to 6 weeks, although progress depends on their starting flexibility and consistency.
A review involving 6,654 adults found that flexibility improvements reached a plateau at approximately 10 minutes of cumulative static stretching per week, with no additional benefit demonstrated at higher amounts. That is encouraging if you have limited time.
A manageable routine practiced consistently can be more practical than trying to fit a lengthy stretching session into an already busy day.
Therefore, we recommend adjusting your stretching routine around the activity you’re preparing for.
Dynamic lunges and World’s Greatest Stretch are useful before exercise because they involve controlled movement. Longer static holds generally fit better after training or during dedicated mobility sessions. Before deeper static stretching, spend a few minutes walking or marching to warm your muscles.
Summary
Effective hip flexor stretches require controlled movement, comfortable positioning, and consistency rather than maximum stretching intensity.
Begin with standing or half-kneeling variations, where maintaining pelvic alignment is generally easier. Progress toward the couch stretch only when you can manage the additional knee bend without discomfort or lower-back compensation.
Combine regular stretching with movement breaks and strengthening exercises to develop hip mobility you can use during everyday activities.